
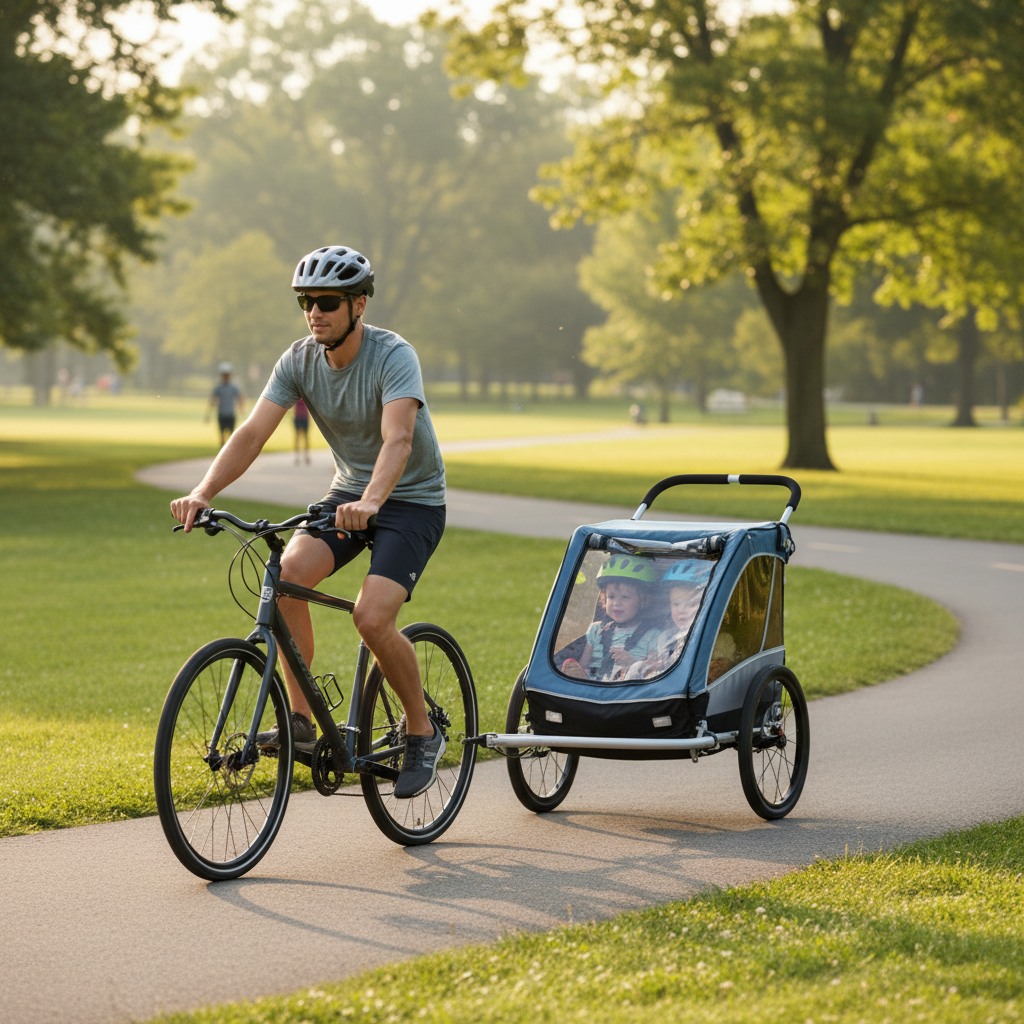
The best bike trailer for kids in 2026 is the one that matches your bike, your routes, and your child’s size, not the one with the longest feature list. Most buying regret comes from three things: poor fit to your axle or frame, underestimating cargo and kid weight, and choosing comfort features that don’t match how long you actually ride.
If you’re juggling daycare runs, weekend greenways, or occasional gravel paths, a trailer can feel like the “safe, easy” option, until you notice sway on turns, a fussy harness, or a cover that leaks in a real downpour. That’s why it’s worth slowing down and deciding what matters for your use, handling, and storage.
This guide helps you pick the right category, compare key specs without getting lost, and avoid the common compatibility traps. I’ll also include a quick table and a short checklist you can run through before you buy.
What matters most in a kids bike trailer (the 80/20 features)
You can compare a dozen trailers and still miss the two features that make daily use pleasant. In real life, these tend to matter most.
- Hitch and compatibility: Your frame style and rear axle type can make a “universal” hitch not so universal.
- Track width and wheel size: Wider stance often feels steadier, larger wheels usually roll smoother over cracks.
- Harness and seating: A 5-point harness is common; what varies is adjustability and how fast you can buckle it.
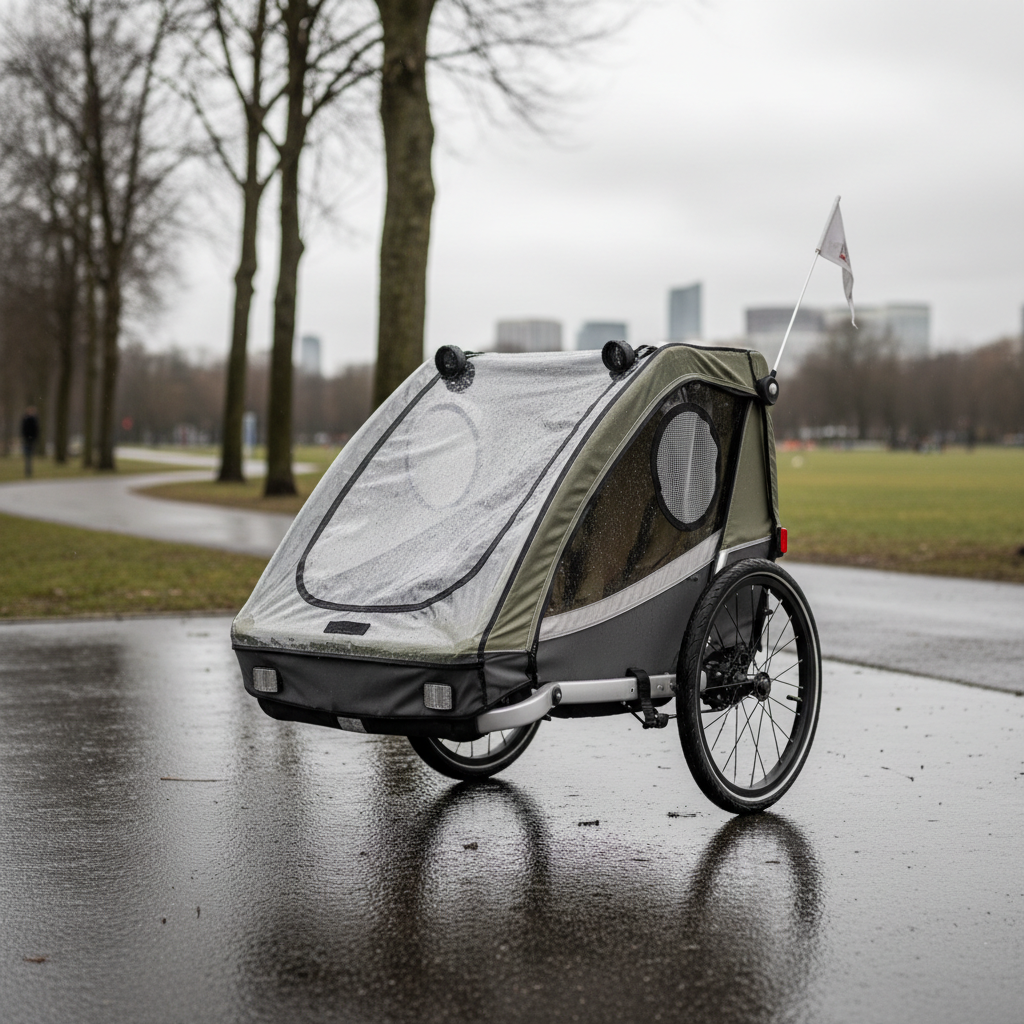
- Weather protection: A canopy that seals well and vents reasonably matters more than a “rain cover” marketing line.
- Fold and storage: If it lives in an apartment or small garage, fold simplicity becomes the feature.
Key takeaway: start with compatibility and stability, then decide comfort and convenience features based on ride length and terrain.
Quick comparison table: choose your trailer type
Instead of chasing a single “winner,” it’s usually smarter to pick a trailer type first, then shop within that lane.
| Trailer type | Best for | Trade-offs | Must-check |
|---|---|---|---|
| Budget 1–2 seat | Short paved rides, occasional use | Less refined suspension/fit, noisier ride | Hitch quality, harness comfort |
| Everyday commuter | Daycare runs, weekly errands | Higher cost, bigger storage footprint | Fold speed, cargo space, rain sealing |
| Premium comfort | Longer rides, mixed pavement | Price, sometimes heavier | Suspension tuning, seat recline |
| All-terrain oriented | Crushed gravel, rough paths | Not as nimble in tight urban spaces | Wheel size, ground clearance |
| Convertible (jogger/stroller) | Families who switch modes often | More parts to manage, higher price | Conversion steps, brake function |
Safety and comfort: what to look for without overbuying
Kid trailers are simple, but safety claims can sound absolute when they’re not. You’re looking for sensible design choices and good daily habits.
According to NHTSA and the CDC, child passenger safety and head protection are important risk-reduction measures in traffic environments, and many families extend that logic to biking by using properly fitted helmets and consistent safety routines. Local laws and guidance can vary, so it’s worth checking your city or state recommendations.
Here’s what tends to be worth prioritizing:
- Low center of gravity: Helps reduce tippy feeling in turns.
- Bright visibility: Flag + reflectors; if you ride near dusk, consider adding a rear light.
- Ventilation: Kids overheat faster than adults in a closed canopy, especially in humid areas.
- Suspension (situational): If you mostly ride smooth paths, you may not feel much difference; on cracked sidewalks, it can be a big comfort boost.
- Interior head clearance: Helmets add bulk, make sure the top doesn’t rub constantly.
What to treat as “nice but optional” for many buyers: ultra-premium fabrics, multiple pocket systems, and extra conversion kits you won’t use.
Fit and compatibility: the part most people discover too late
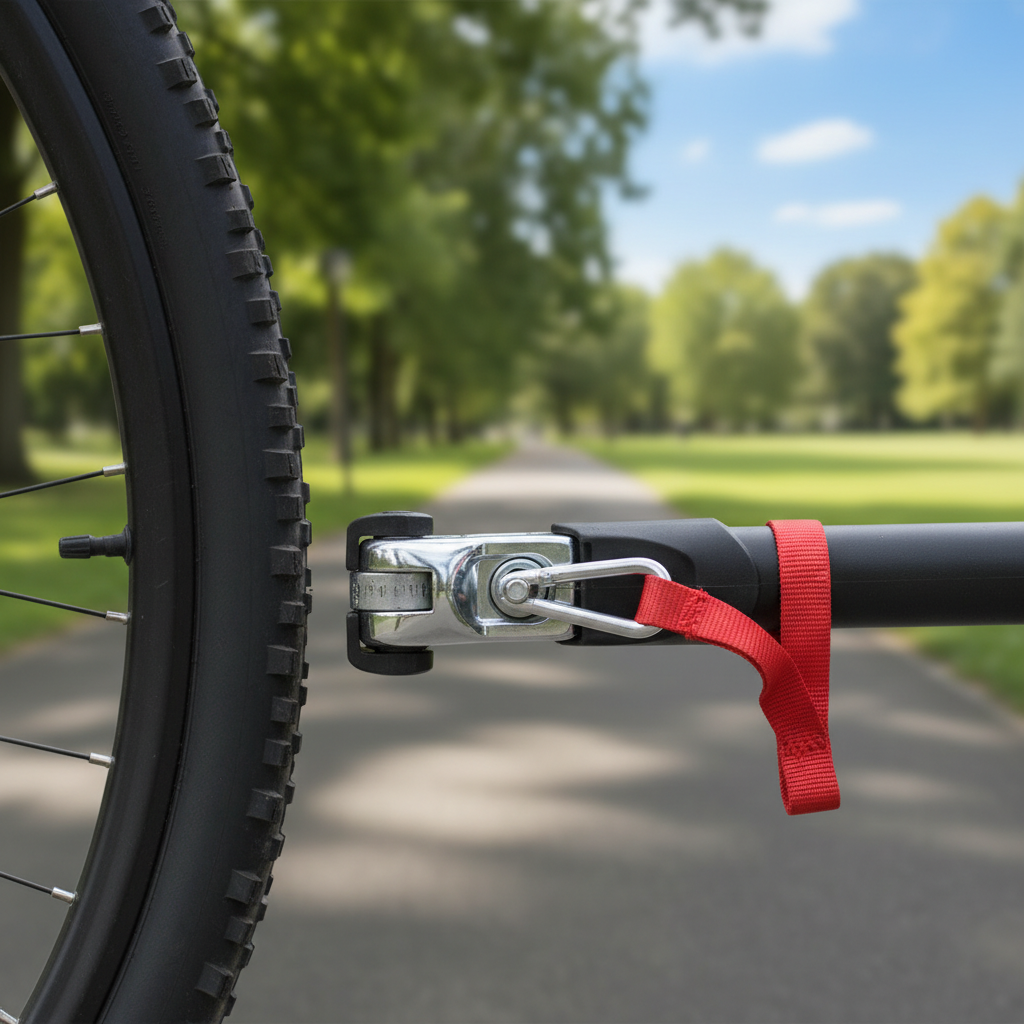
Even when the trailer itself is great, a messy hitch setup can ruin it. The “best bike trailer for kids” quickly becomes the wrong choice if it won’t mount cleanly on your bike.
Before you buy, confirm these 5 items
- Rear axle type: quick release vs. thru-axle. Many modern bikes use thru-axles and may need an adapter.
- Brake and frame clearance: disc brake calipers and racks can interfere with some couplers.
- Wheel size and tire width: doesn’t usually block fit, but can change handling and hitch position.
- E-bike considerations: some brands restrict trailer towing; check your bike manual to avoid warranty headaches.
- Total load: child weight + gear weight + trailer weight, compared to both trailer rating and your bike’s towing guidance.
If anything feels borderline, it’s often cheaper to confirm with the trailer manufacturer’s compatibility chart or customer support than to “try it and return it,” especially during peak season.
Self-check: which trailer category fits your family?
If you answer these quickly, your shortlist gets much shorter.
- Ride frequency: 1–2 times/month, weekly, or near-daily?
- Typical route: protected bike paths, neighborhood streets, or rough multi-use trails?
- Storage reality: will it fit through your door, elevator, or trunk without a fight?
- Kids now vs. later: one toddler now but a second kid likely soon, or you’re done?
- Weather tolerance: do you ride through light rain and cold, or only fair-weather?
Decision shortcut: if you ride weekly and store indoors, prioritize fold and handling; if you ride longer distances, prioritize comfort and ventilation; if you haul groceries, prioritize cargo volume and stable tracking.
How to choose and set up a bike trailer step by step
This is the practical sequence that avoids most “why does this feel sketchy?” moments.
1) Pick seat count based on your real horizon
A two-seater can be handy even with one child because it gives elbow room and space for a diaper bag, but it’s wider and may feel bulky on narrow paths. If you’re sure it’s one kid only and you ride tight routes, one seat can feel easier.
2) Match wheels and suspension to terrain
For smooth paved trails, mid-size wheels and no suspension often work fine. If your town has cracked sidewalks, curb cuts, and bumpy transitions, consider bigger wheels and some suspension so your child isn’t rattled for 30 minutes.
3) Install the hitch carefully and add the safety strap
Follow the manual closely, then do a gentle pull test. Many hitches also use a secondary strap as backup; don’t skip it because you’re “just going around the block.”
4) Do a “no-kid test ride” and then a short kid ride
Ride empty first to feel turning radius and braking distance. Then do a 10-minute loop with your child, checking harness fit, helmet clearance, and whether the trailer tracks straight.
5) Adjust tire pressure and re-check fasteners
Underinflated trailer tires can feel sluggish and squirmy; overinflated tires can feel harsh. Use the tire sidewall range as a starting point, then tune within that range for comfort.
Common mistakes (and what to do instead)
- Assuming “universal hitch” means universal: confirm axle type and required adapters before checkout.
- Buying for a once-a-year vacation ride: rentals can make more sense if you rarely use it.
- Ignoring heat build-up: on warm days, open vents, take breaks, bring water, and keep rides shorter.
- Overloading the rear cargo: too much weight behind the child seat can change stability; keep heavy items low and centered when possible.
- Skipping the practice routine: the first ride should not be in traffic; get comfortable with braking and cornering first.
When it makes sense to get expert help
If you’re unsure about axle compatibility, towing limits for an e-bike, or you’re mixing a trailer with a carbon frame or unusual dropout design, it’s reasonable to ask a local bike shop for a quick fit check. Many shops can confirm the right hitch adapter and torque specs, which is especially helpful if you don’t have a torque wrench.
If your child has a medical condition that affects posture, neck control, or tolerance to vibration, it’s smart to consult a pediatric professional before longer rides, because comfort and restraint needs can vary a lot by child.
Conclusion: the “best” pick is the one you’ll use confidently
The best choice usually comes down to three clear decisions: pick the right type for your routes, confirm hitch compatibility before buying, and prioritize stability plus ventilation over fancy add-ons. If you do those, you’ll end up with a setup you trust, and your child will likely be more comfortable too.
Action step: write down your bike’s rear axle type and your most common route surface, then use the table above to choose a category and shortlist 2–3 models that match.