
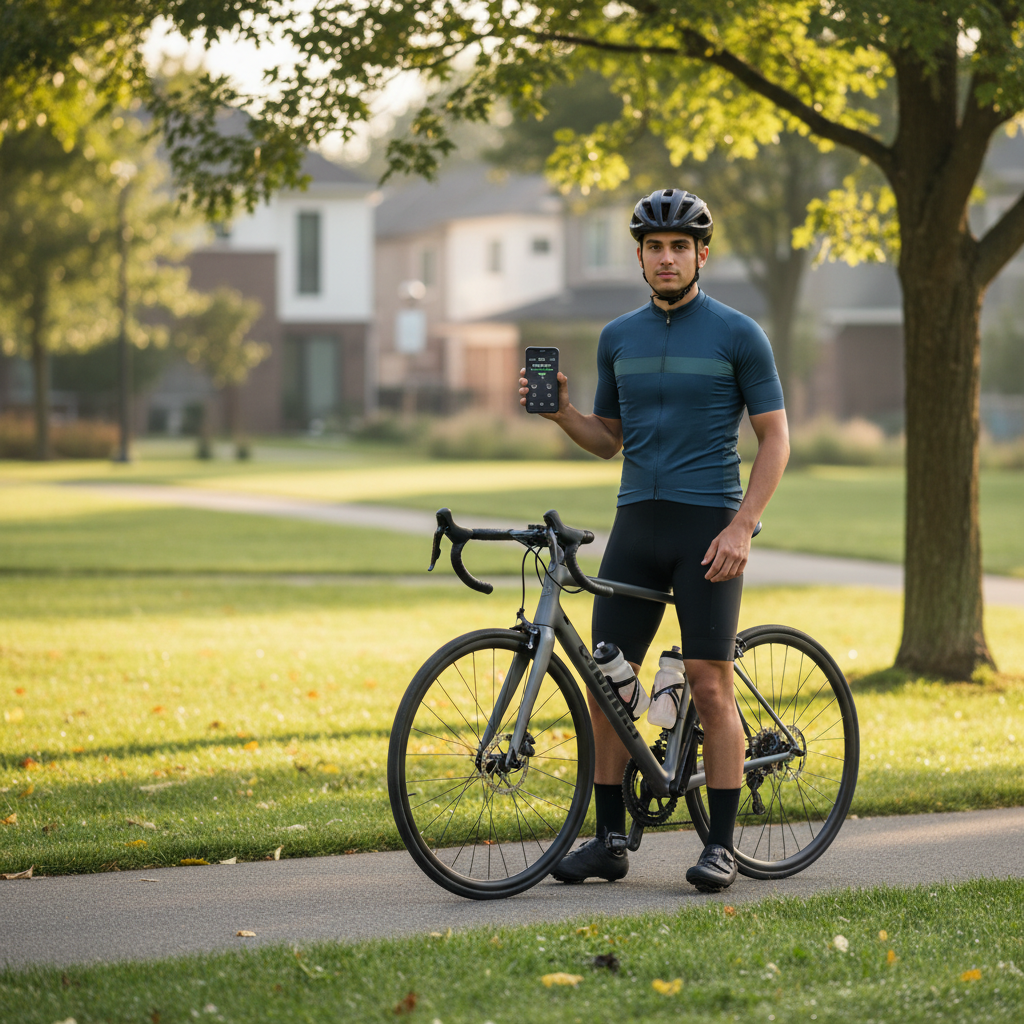
how to use a cycling app for beginners usually comes down to three things: picking an app that matches your riding style, setting it up so tracking works reliably, and learning a few features that keep you motivated without distracting you on the road.
If you have ever ended a ride thinking, “Did that even record?” or “Why is my pace totally wrong?”, you are not alone. Cycling apps can feel busy at first, and small settings like GPS permissions or auto-pause can change your results a lot.
This guide keeps it practical. You will learn what to set up on day one, what to ignore for now, and a simple routine to start rides, review your stats, and improve over a few weeks without getting lost in menus.
Choose a Cycling App That Fits Your First 30 Days
For beginners, the “best” app is usually the one you will actually open before you roll out. Many apps share similar basics, ride recording, maps, distance, speed, and calories estimates, so the decision often comes down to your goal.
Match the app to your main goal
- Just track rides and routes: Look for simple recording, clear maps, and easy export or sharing.
- Get motivated: Social features, challenges, streaks, and friendly leaderboards can help, but can also overwhelm some people.
- Train with structure: If you want workouts, intervals, or power-based plans, pick an app that supports training sessions and device pairing.
- Commute and safety: Some apps emphasize navigation, incident detection, or live tracking with family.
A quick reality check: many features sit behind subscriptions. Start with the free version for a week and only upgrade if one specific feature keeps coming up as missing.
A simple comparison table (what beginners usually care about)
| Need | What to look for | Nice to have later |
|---|---|---|
| Accurate tracking | Stable GPS recording, auto-pause toggle, battery-friendly mode | Offline maps, route correction tools |
| Easy review | Clear ride summary, weekly totals, simple charts | Advanced analytics, segment breakdowns |
| Motivation | Goals, reminders, basic achievements | Community clubs, challenges, badges |
| Training growth | Heart-rate support (optional), effort tracking | Power meter, training plans, FTP tools |
Do the “Boring Setup” Once, So Every Ride Counts
This is the part most beginners skip, then blame the app later. Good setup reduces GPS dropouts, weird speed spikes, and missing rides in your history.
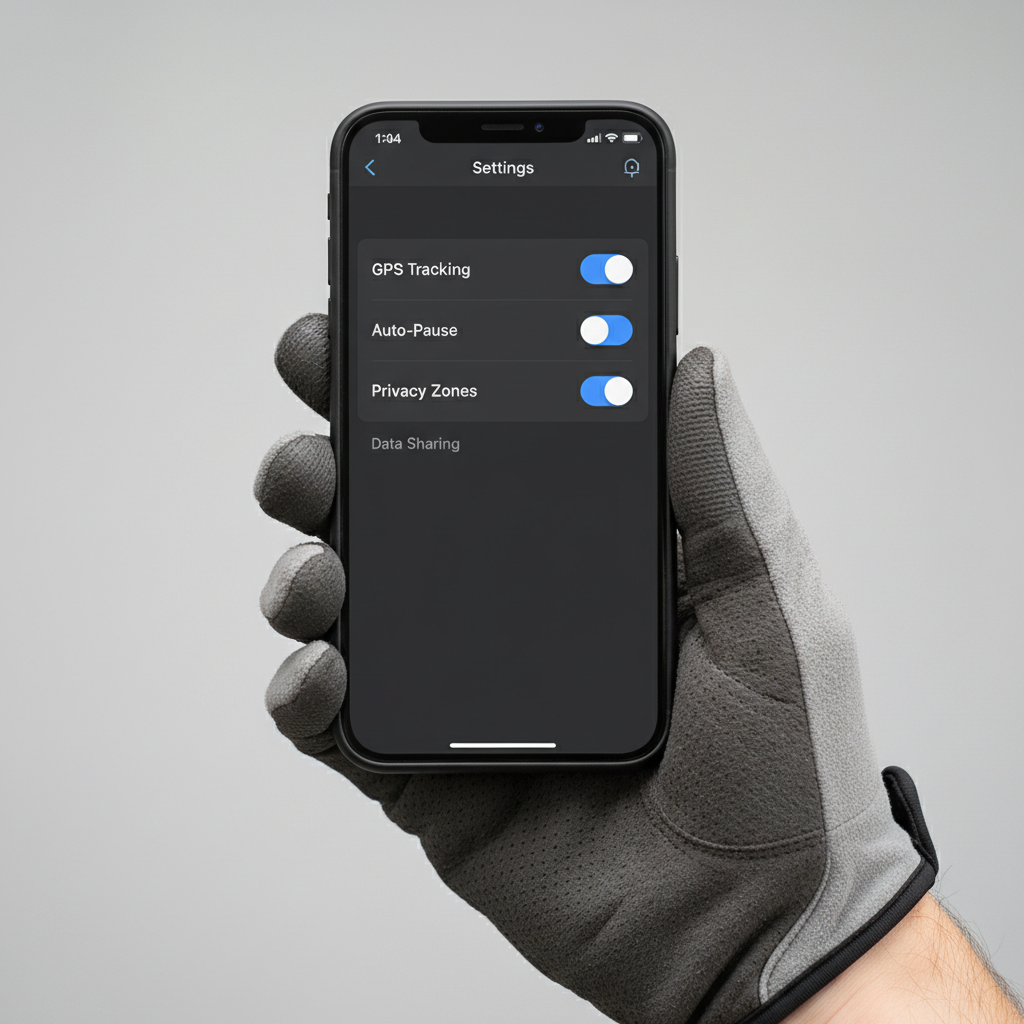
Permissions and phone settings that matter
- Location permission: Set to “Always” or “While Using” depending on your phone, but make sure it can track with the screen off.
- Motion/Fitness permission (iPhone): Some apps use it for better movement detection and auto-pause behavior.
- Battery optimization: On Android especially, exempt the app from battery optimization so it does not get put to sleep mid-ride.
- Background refresh: Enable it if your phone uses it, otherwise tracking can stall.
In-app settings worth touching on day one
- Auto-pause: Helpful for city riding with lots of lights, but it can undercount time if it pauses too aggressively.
- Units: Miles vs kilometers, and whether speed shows as mph.
- Privacy: If you start from home, set a privacy zone so your exact address does not appear on public maps.
- Default activity type: “Ride” vs “Indoor cycling” matters for how some apps interpret GPS and effort.
According to Apple Support, iPhone users can control whether apps access location “Always” or “While Using,” and this choice can affect background tracking reliability.
Your First Ride: A Simple Start-to-Finish Workflow
If you want to learn how to use a cycling app for beginners without overthinking, treat the app like a three-step tool: start, ride, save and review. Everything else can wait.
Before you roll
- Open the app outside or near a window and wait for a solid GPS lock, this can take longer in dense neighborhoods.
- Set your phone to Do Not Disturb or Focus so notifications do not interrupt recording.
- Mount the phone securely or keep it in a stable pocket, shaky placement can hurt GPS quality and safety.
During the ride (keep it boring on purpose)
- Glance only when stopped, or use audio cues if the app supports them.
- Do not chase speed numbers early on, wind, hills, and GPS smoothing make “instant speed” noisy.
- If you ride with earbuds, keep volume low or use one ear only, and follow local laws.
After the ride
- Stop recording, then save the ride, many people accidentally discard.
- Name it simply, for example “Easy ride” or “Commute,” so you can spot patterns later.
- Scan the map for big gaps, then check distance and moving time before you over-interpret pace.
Safety note: if you are tempted to interact with the phone while moving, consider using a bike computer or audio-only prompts instead. In many situations, fewer taps equals safer riding.
Quick Self-Check: Are Your Numbers “Good Enough” Yet?
Beginners often worry their data looks “wrong,” but early tracking issues are usually predictable. Use this checklist to decide whether you should adjust settings or just keep riding.
- My route line looks jagged or cuts corners: Common in cities, under trees, or near tall buildings, try starting GPS earlier and keeping the phone closer to the top of a bag or jersey pocket.
- Speed spikes appear: Often GPS drift, check battery optimization and try a higher accuracy mode if available.
- Distance seems short: Auto-pause can reduce moving time, or GPS sampling may be too low.
- Calories look unrealistic: Without heart rate, apps estimate using generic formulas, treat calories as a rough trend, not a precise number.
- The ride did not upload: Check permissions, background data, and whether you ended the ride correctly.
According to Garmin Support, GPS accuracy can be affected by environmental conditions like tree cover and buildings, which is why the same route can look different on different days.
Level Up Gently: Features Worth Using (and What to Ignore)
Once you can record rides consistently, you can add one “upgrade” at a time. This keeps learning simple and makes your cycling app feel helpful instead of noisy.
Worth adding in week 2
- Goals: Weekly minutes or number of rides, not speed targets, usually feels more encouraging.
- Route planning: Save one safe loop you enjoy, then repeat it to see progress.
- Heart-rate pairing (optional): A chest strap or armband can make effort tracking more meaningful than speed alone.
Often safe to ignore until later
- Segments and leaderboards: Fun, but can push people to ride harder than planned.
- Deep analytics: Power curves, advanced charts, and gear tracking can wait until you have consistent habits.
- Nutrition logging: Useful for some, but it can become a distraction early on.
Common Beginner Mistakes That Make Apps Feel “Hard”
Most frustration comes from a few habits, not from the app itself. Fix these and the learning curve drops fast.
- Starting the ride late: If you roll out before GPS settles, your first mile might look odd.
- Recording every tiny errand: Your history becomes messy, then you stop reviewing it. Consider tagging short rides as “Commute” or keeping them private.
- Comparing to others too early: Terrain, traffic, and bike type change averages a lot, your first benchmark should be your own last week.
- Obsessing over calorie burn: Estimates vary by app and settings, trends matter more than single-ride numbers.
- Letting the phone die: Low Power Mode, screen brightness, and background apps can matter more than people expect.
Practical Routine: Make Progress Without Staring at Stats
If you want how to use a cycling app for beginners to actually improve your riding, give yourself a repeatable review habit that takes five minutes.
After each ride (2 minutes)
- Check moving time and distance, then add a short note like “windy” or “felt easy.”
- Make sure the map looks reasonable and the ride saved correctly.
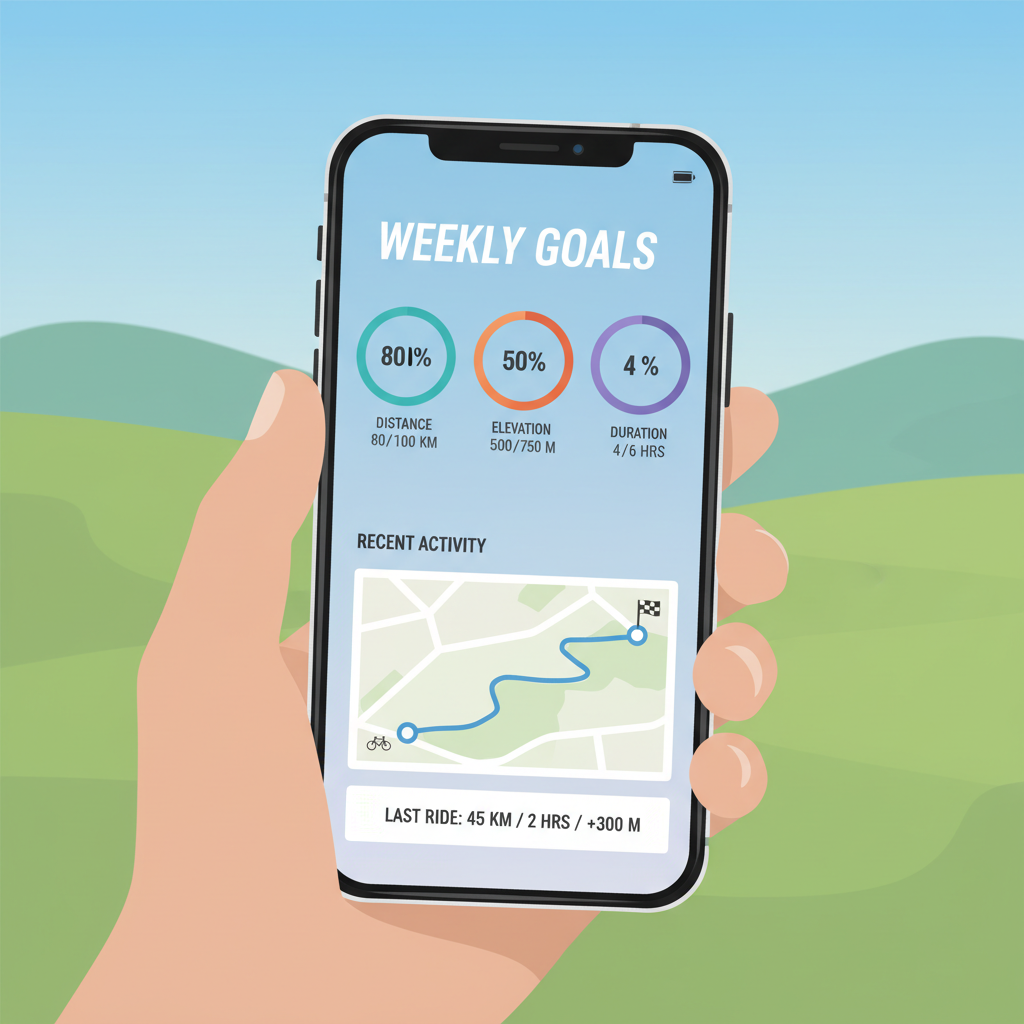
Once a week (5 minutes)
- Look at weekly totals: rides, time, and distance.
- Pick one small change for next week, for example add 10 minutes to one ride or repeat your favorite loop once more.
- If you use heart rate, look for “same route, lower average HR” rather than faster speeds.
Key takeaways to keep on your home screen
- Consistency beats complexity: reliable recording matters more than fancy charts.
- One new feature at a time: goals first, then routes, then devices if you want them.
- Safety wins: set it up before riding, keep interaction minimal on the move.
When to Get Extra Help (or a Different Setup)
If you keep hitting the same wall, it might be time to change your setup rather than forcing the app.
- Frequent GPS failures: Try a different app, update your phone OS, or consider a basic bike computer for recording.
- Health concerns: If you use heart-rate zones or training plans and feel dizzy, unusually short of breath, or have chest discomfort, stop riding and consider asking a clinician for guidance.
- Safety needs: If you ride solo often, look into live tracking and incident detection, but treat them as backup, not a guarantee.
According to CDC guidance on physical activity, building up gradually and choosing safe ways to be active supports long-term consistency, which is exactly what beginners need from tracking tools too.
Conclusion: Keep the App Simple, and It Becomes Easy
Once your permissions and battery settings stop getting in the way, a cycling app becomes straightforward: start the ride, keep interaction minimal, save it, then review one or two numbers that matter. That is the core of how to use a cycling app for beginners without turning every ride into a tech project.
Your next step is simple, pick one app, do the setup checklist today, then record three rides this week. After that, add a single feature you actually want, like a weekly goal or a saved route, and ignore the rest until you are ready.