
how to shift gears on a road bike is mostly about timing and touch, not strength: ease pedal pressure, pick the right lever, and shift before the hill forces you to mash.
If you’ve ever heard loud grinding, felt the chain “clunk,” or panicked when your cadence got away from you, you’re not alone. Road drivetrains are precise, but they reward small, calm inputs, especially when you’re tired or climbing.
This guide breaks down what each shifter does, how to choose gears in real riding situations, and what to change if shifting still feels rough. No mystique, just the stuff that actually helps on the road.
Understand what your gears are doing (without overthinking it)
On most road bikes, you’re managing two systems at once: the front chainrings (big jumps) and the rear cassette (small steps). The goal is simple: keep your legs spinning comfortably while keeping the chain running quietly and straight-ish.
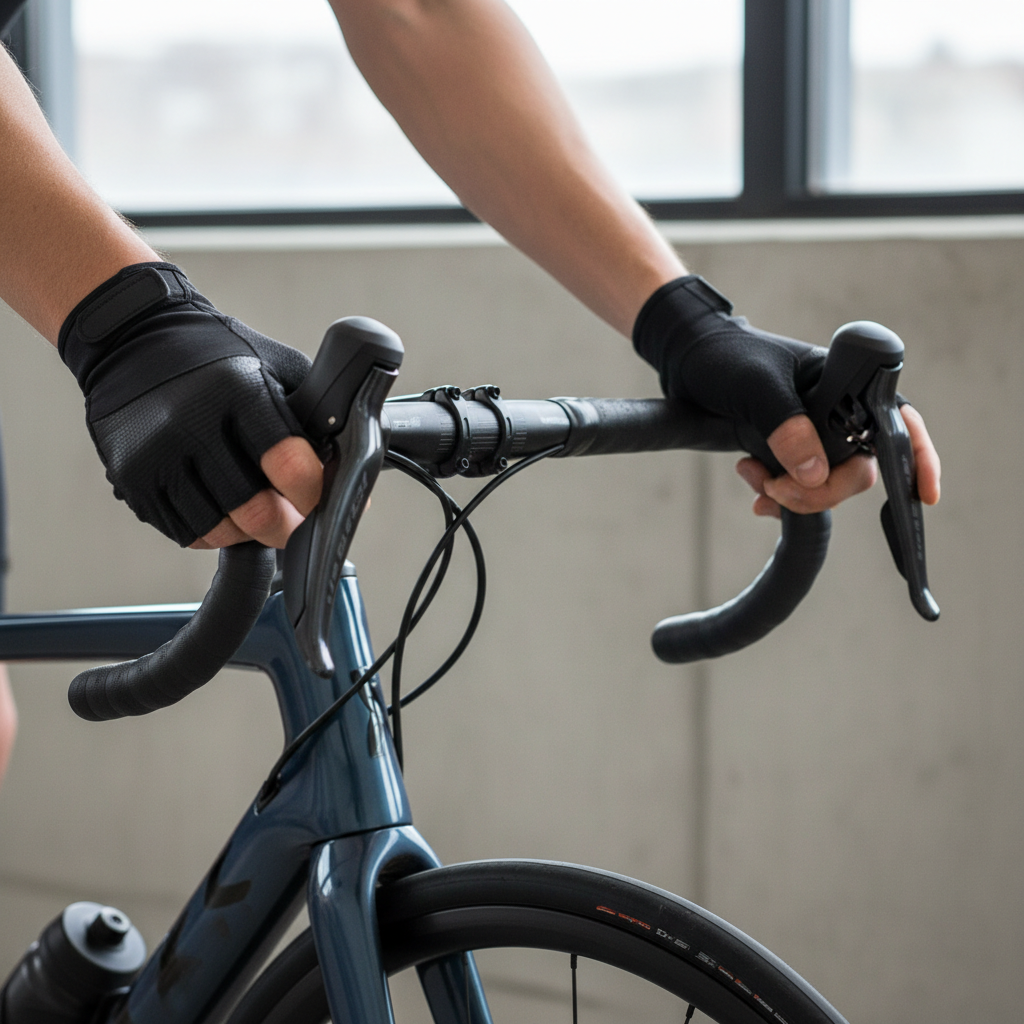
- Front shift (left hand): changes chainrings, this is your “range” control for flats vs climbs.
- Rear shift (right hand): changes cogs, this is your fine-tuning for cadence and speed.
A practical mental model that works for many riders: use the rear for constant little adjustments, touch the front only when the rear runs out of comfortable options.
Know your shifters: Shimano vs SRAM vs Campagnolo
Most modern road bikes use integrated brake/shift levers, but the “button logic” differs. If you’re borrowing a bike or switching brands, this is where confusion starts.
| System | Typical shifting action | Common beginner mistake |
|---|---|---|
| Shimano (mechanical) | Two paddles behind brake lever: one harder gear, one easier | Pressing the wrong paddle while sprinting, then “crossing” gears |
| SRAM DoubleTap (mechanical) | One paddle: short push = harder, long push = easier | Over-pushing and jumping multiple gears unintentionally |
| Campagnolo (mechanical) | Separate lever/button layout depending on model | Reaching awkwardly and shifting mid-stomp |
| Electronic (Di2/eTap/EPS) | Buttons: usually right = harder, left = easier; front via dedicated button(s) | Holding a button and “auto-multi-shifting” more than planned |
If you’re unsure, do a 30-second test in a safe area: lift the rear wheel (or ride slowly), click once, watch the derailleur move, then label it in your head as easier or harder.
The core technique: shift with less pressure, a touch earlier
Most ugly shifting comes from one habit: shifting while you’re pushing hard on the pedals. The chain can move under load, but it’s noisier, slower, and more likely to overshoot.
- Soften your pedal stroke for about half a second as you click.
- Keep pedaling (don’t stop turning), the drivetrain needs motion to complete the shift.
- Shift early on climbs, do it before your cadence collapses.
According to USA Cycling, smooth shifting and steady cadence help maintain control and efficiency during changes in terrain. That’s exactly the point here: you’re protecting momentum, not “finding a perfect gear.”

One more thing that surprises people: if you wait until the bike feels “too hard,” you often need multiple shifts quickly, and that’s when chains rattle, skip, or drop. Anticipation is the skill.
Which gear should you be in? Quick decision rules for real rides
You can go deep on gear ratios, but most riders just want a reliable way to decide on the fly. Use cadence and breathing as your dashboard.
Use these simple cues
- If cadence feels too slow (legs bogging down), shift to an easier gear.
- If cadence feels frantic (spinning out), shift to a harder gear.
- If you’re about to climb, shift easier before the steep part, not during the worst of it.
- If you’re cresting a hill, shift harder as the grade relaxes, but keep pressure light.
A sanity check for flats
On flat roads, many people settle into the big chainring with a mid-cassette cog. If you’re in the big ring and still need very easy rear gears for normal cruising, it may be a fitness/terrain mismatch, or your bike’s gearing may be more “race” than “all-day comfortable.”
A fast self-check: are you shifting well, or fighting the setup?
Before you keep practicing technique, it helps to confirm the bike isn’t sabotaging you. Here’s a quick checklist you can run in a parking lot.
- One click = one gear change most of the time, no hesitation.
- No chain rub in the front derailleur when riding steady in common gears.
- No skipping under load (chain jumping teeth) when you pedal firmly.
- Shifts both directions on the rear cassette, including the biggest and smallest cogs.
- Chain stays on during front shifts, no falling off to the inside or outside.
If two or more items fail, you may be dealing with a tuning or wear issue, not just learning curve. That’s normal, especially if the bike has seen miles or a recent cable stretch.
Step-by-step: smoother shifting in common scenarios
Below are “scripts” you can rehearse. It’s not about being robotic, it’s about giving your hands something predictable when the road gets busy.
Starting from a stoplight
- Before you stop, click into an easier rear gear so you can spin up smoothly.
- Start pedaling, build cadence, then shift harder in small steps.
Rolling hills
- As the road tilts up, shift easier one click at a time, keeping cadence steady.
- If you’re near the easiest rear cogs and still grinding, consider a front downshift (to smaller chainring) while easing pressure.
- After the crest, shift harder gradually, avoid dumping multiple gears while standing and stomping.
Headwinds
- Assume you’ll need one or two gears easier than usual.
- Stay seated, keep the chain quiet, and shift in small steps to avoid surges.
Sprinting or hard efforts
- Pre-select the gear before you launch, then make minimal shifts during the effort.
- If you must shift, soften pedal force briefly, even if it costs a tiny bit of speed.
Common mistakes that cause noise, chain drops, and “why won’t it shift?” moments
Most mistakes are understandable, and fixing them is usually quicker than people expect.
- Shifting under heavy torque: ease pressure, shift, then reapply power.
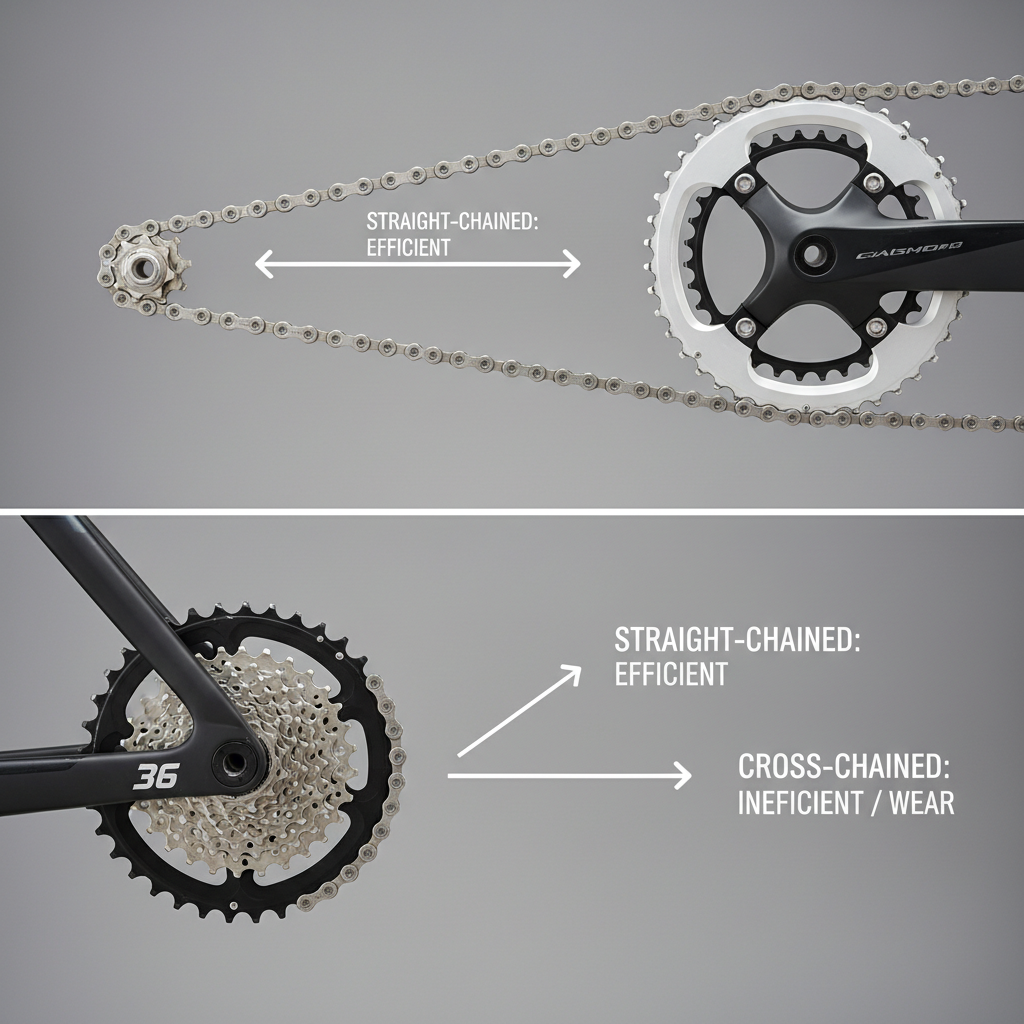
- Cross-chaining: big ring + biggest rear cogs, or small ring + smallest cogs, often sounds rough and can increase wear.
- Multiple big jumps at once: dumping 4–6 gears can overwhelm the system, especially on mechanical setups.
- Front shifting too late on a climb: the front derailleur needs a calmer chain to move cleanly.
- Ignoring drivetrain cleanliness: a dry, dirty chain often shifts poorly even when adjustment is “correct.”
According to Park Tool, basic drivetrain maintenance like proper cleaning and lubrication supports smoother shifting and reduces component wear. You don’t need perfection, but a neglected chain can make good technique feel pointless.
When to adjust the bike (and when to ask a shop)
It’s smart to separate technique from mechanics. If you’re doing the basics right and it still clunks, the bike may need attention.
Try these low-risk checks
- Inspect the chain for rust, stiff links, or obvious grime buildup, clean and lube if needed.
- Check cable tension symptoms: if it struggles to shift to bigger rear cogs, it may need slightly more tension; if it struggles to shift to smaller cogs, it may need less. Small changes matter.
- Look for crash damage or a bent derailleur hanger if shifting is suddenly terrible after a tip-over.
Get professional help if you notice any of these
- Chain skips under moderate power even after cleaning and basic adjustment.
- Rear derailleur won’t reach the largest or smallest cog, limit screws may need correct setting.
- Front shifts frequently drop the chain off the rings, especially toward the frame.
- You feel unsure making adjustments, or your bike uses internal routing or electronic systems you’re not familiar with.
If you’re new to wrenching, a tune-up from a reputable shop can be a good baseline. After that, your practice time actually pays off.
Key takeaways you can remember mid-ride
- Shift early before the climb forces you to grind.
- Ease pressure for a moment while the chain moves.
- Rear for fine-tuning, front for big terrain changes.
- Noise is feedback, if it’s loud, you’re likely cross-chained or shifting under load.
Conclusion: make shifting boring, and your rides get better
Once how to shift gears on a road bike clicks, it stops feeling like a separate skill and starts feeling like steering, just part of riding. Aim for quiet shifts, earlier decisions, and steady cadence, and you’ll waste less energy fighting the bike.
Your next ride, pick one focus: shift before the hill, or soften your pedal stroke for every click. Give it 20 minutes and you’ll usually feel the difference.