
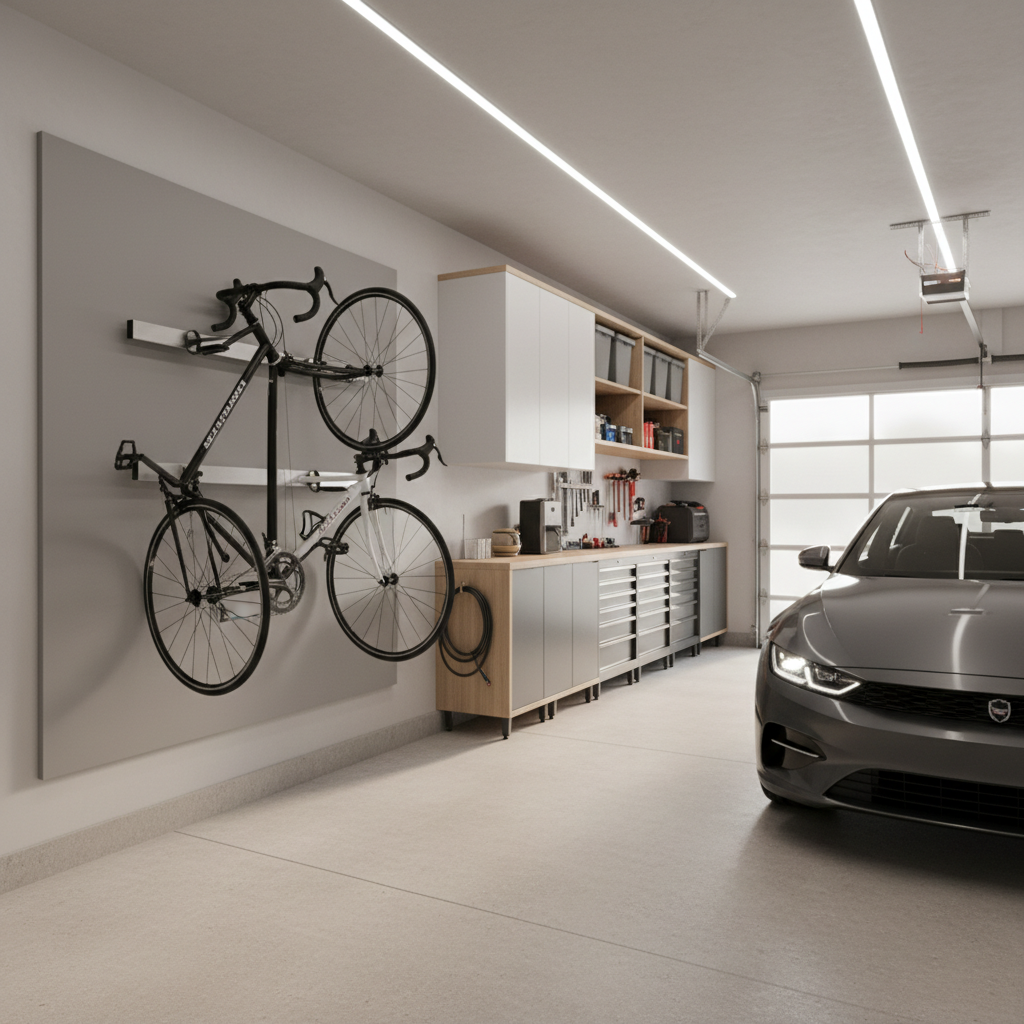
Best bike rack for garage storage choices come down to one thing most people underestimate: how your garage actually gets used day to day, not how you wish it worked. If you pick a rack style that fights your parking space, door swing, or family routines, it usually ends up half-used, or worse, leaning bikes against drywall again.
That’s why this guide stays practical. You’ll see what rack types work in real U.S. garages, what to measure before you buy, and how to avoid the common “looks great online, annoying at home” trap. I’ll also call out when you should slow down and get help, because ceilings, ladders, and heavy e-bikes can turn a simple project into a safety issue.
Quick note before we get into options: “best” rarely means the most expensive rack. It usually means the rack style that matches your bike weights, your wall structure, and how often you roll bikes in and out. If you get those three right, most mid-range products perform well.
What “best” really means for garage bike storage in 2026
In 2026, garages look more mixed-use than ever, gym corner, tool wall, kids’ scooters, seasonal bins, and sometimes a second fridge. So the best bike rack for garage storage is usually the one that protects your space and your bikes while staying easy enough that everyone actually uses it.
- Space efficiency: Wall and ceiling systems reclaim floor space, but they need good layout planning.
- Ease of daily use: If lifting feels like a workout, you’ll stop doing it, especially with heavier bikes.
- Bike protection: Look for stable contact points and spacing so bars and pedals don’t bang together.
- Garage compatibility: Stud spacing, drywall condition, ceiling height, and door tracks matter more than most listings admit.
- Security basics: A rack can help reduce opportunistic theft if you can lock to it, but garage security also depends on doors, openers, and habits.
According to CPSC (U.S. Consumer Product Safety Commission), home injury prevention often comes down to following product instructions and using equipment as intended, which applies directly to loading limits, anchors, and ladder use when you install overhead storage.
Top garage bike rack types and who each one fits
Most products fall into a few rack “families.” Picking the family first saves time, then you compare brands within that style.
1) Wall-mounted horizontal racks (top tube or arms)
Great for road and hybrid bikes, decent for many kids bikes, sometimes awkward for full-suspension mountain bikes with odd frame shapes. You mount a bracket to studs, then set the top tube or frame on arms.
- Why people like it: Easy load/unload, bikes stay off the ground.
- Watch-outs: Wide handlebars eat wall width, pedal strikes on adjacent bikes if spacing is tight.
2) Vertical wall hooks (front wheel hang)
This is the “hang by the wheel” approach. It’s one of the most space-efficient options for narrow wall sections, and it’s usually budget-friendly.
- Why people like it: Minimal footprint, simple hardware.
- Watch-outs: Lifting the front wheel every time, and some fenders or deep rims can be finicky.
3) Freestanding floor racks (no drilling)
If you rent, dislike drilling, or your walls are packed with cabinets, freestanding racks can be the calm choice. They range from simple “wheel tray” racks to multi-bike stands.
- Why people like it: No studs needed, quick setup, easy to move.
- Watch-outs: You give up floor space, and some models wobble when kids yank bikes out fast.
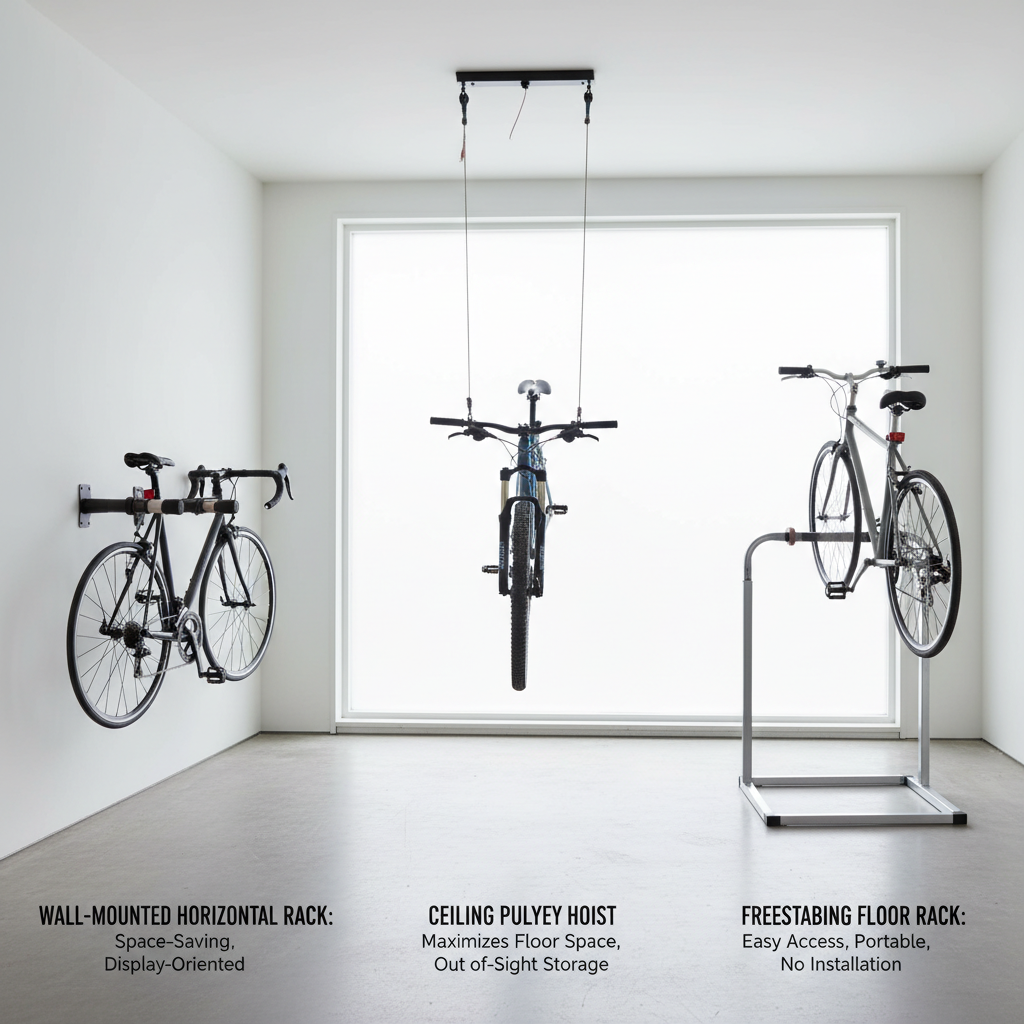
4) Ceiling-mounted hoists and pulley systems
Perfect when wall space is limited and ceilings are tall enough. These can be excellent for seasonal bikes, but daily lifting can get old, especially with e-bikes.
- Why people like it: Maximum space saving, keeps bikes out of traffic paths.
- Watch-outs: Installation complexity, overhead safety, and clearance around garage door rails.
5) Rail/track systems (modular wall storage)
Track systems shine when you have multiple bikes and you want flexibility. Hooks and cradles slide along a wall rail, so you can reconfigure as bikes change.
- Why people like it: Scales well, cleaner look, adjustable spacing.
- Watch-outs: Higher upfront cost, and you still need solid mounting into studs or appropriate anchors.
Quick decision table: pick the right rack style faster
If you want a fast filter, use this chart as your starting point, then measure before you buy.
| Garage situation | Rack style that often works | Why | Common downside |
|---|---|---|---|
| Park one car, narrow side wall | Vertical wall hooks or track system | Uses wall height, keeps floor clear | Front-wheel lifting, handlebar overlap |
| Many bikes, changing family sizes | Wall rail/track system | Spacing adjusts as bikes change | Install takes planning |
| Renting or don’t want drilling | Freestanding floor rack | Portable, no wall work | Consumes floor space |
| High ceiling, limited wall area | Ceiling hoist/pulley | Moves bikes overhead | Safety and clearance constraints |
| Heavier e-bikes (often 50+ lb) | Sturdy floor rack or low-lift wall system | Less overhead lifting | May need more footprint |
Measure and check these things before you buy
Most returns happen because people buy a rack before they understand their wall, their bikes, and their clearance. Do this once, and you usually avoid the headache.
- Bike weight: Especially if you have e-bikes. Compare against the rack’s per-bike rating, not just the total rating.
- Tire width: Fat tires can exceed some wheel trays and hooks.
- Ceiling height and door track clearance: Overhead systems need room to lift without hitting the door hardware.
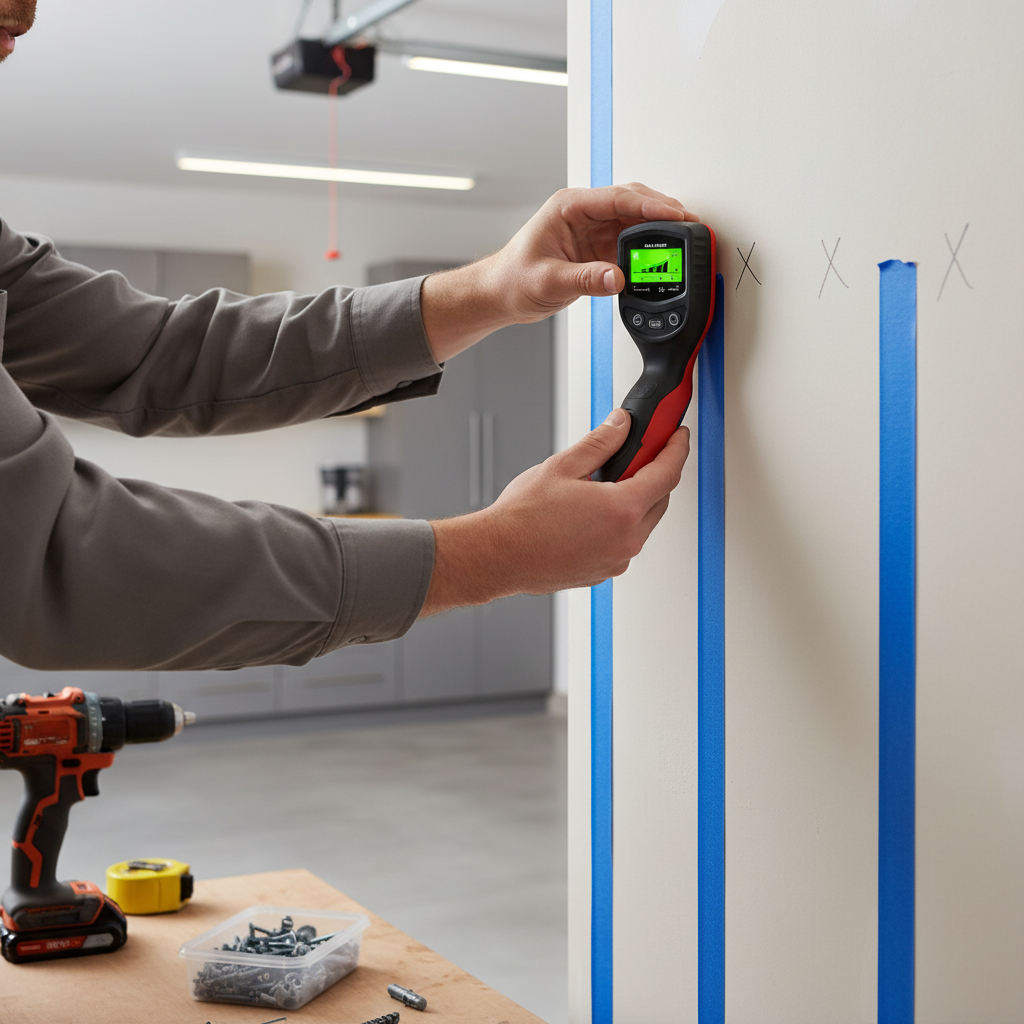
- Stud locations: Many wall racks want stud mounting for stability. A stud finder and painter’s tape save time.
- Handlebar width and pedal spacing: This is the “bikes don’t actually fit side-by-side” problem.
- Traffic path: Think groceries, trash bins, kids running through. Bikes can’t block the normal flow.
According to International Building Code (ICC) guidance adopted in many jurisdictions, structural members and proper fastening are central to safe mounting. In plain language, if you’re unsure what you’re fastening into, slow down and confirm the structure before you hang heavy loads.
Installation and layout tips that prevent the usual regrets
Even a solid rack can feel “wrong” if the layout ignores how you move in the space. These tips come from the patterns that tend to cause complaints later.
Plan the layout with tape first
Mark the rack footprint on the wall or floor with painter’s tape, then open the car doors and walk past it. If you hesitate, your future self will too.
Stagger bikes to avoid handlebar collisions
For wall hooks or track systems, alternating high/low positions reduces bar overlap and makes loading feel less like a puzzle.
Anchor correctly, don’t “hope” drywall holds
Drywall anchors vary a lot, and bike loads are dynamic, bikes get bumped, pulled, and twisted. When a manufacturer says “mount to studs,” treat it as a requirement, not a suggestion.
Make daily-use bikes the easiest to access
Put the most-used bike at shoulder height or in a low-effort position. Seasonal bikes can go higher, tighter, or overhead.
Key features to compare when shopping in 2026
Product pages often highlight “holds X bikes,” but real-world satisfaction comes from a few quieter details.
- Per-bike spacing: More spacing usually beats more capacity, especially with mountain bars.
- Contact surfaces: Rubberized hooks or padded arms help prevent frame scratches.
- Adjustability: Sliding hooks, rotating arms, or multi-position mounts handle different frame shapes.
- Locking points: If you want to lock bikes, look for a fixed loop or bar you can run a U-lock or chain through.
- Hardware quality: Better bolts and clear instructions reduce install “mystery.”
- Weight ratings with a margin: Don’t shop right at the limit, especially for ceiling storage.
If you’re trying to choose the best bike rack for garage storage for a mixed fleet, kids bikes plus one heavy commuter e-bike, it’s often smarter to mix styles: a floor rack for the heaviest bike, wall storage for the lighter ones.
Practical recommendations by scenario (what I’d do in your shoes)
This is the part most buyers actually want: “Tell me what to pick for my situation.” These aren’t absolutes, but they’re reliable starting points.
- 2 bikes, moderate wall space: A simple wall-mounted horizontal rack usually feels easiest day to day.
- 3–6 bikes, family garage: A wall track system with adjustable hooks tends to age well as bike sizes change.
- Apartment/short-term rental garage: A stable freestanding rack avoids wall repairs and still keeps order.
- Low ceiling or lots of overhead garage-door hardware: Skip ceiling hoists unless you confirm clearance carefully.
- Mostly e-bikes: Prioritize low-lift solutions, many overhead hoists become annoying fast with heavy loads.
Key takeaway: the “best” rack is the one you can use quickly with one hand while holding a helmet or a kid’s scooter in the other. Convenience is what keeps the garage from sliding back into chaos.
Safety notes, common mistakes, and when to get help
Garage storage seems harmless until something drops or pulls out of a wall. If anything here feels uncertain, it’s fine to treat it as a small home-safety project, not a casual weekend screw-and-go.
- Don’t mount into questionable surfaces: Crumbly drywall, water-damaged studs, or old plaster can behave unpredictably.
- Respect garage door components: Tracks, springs, and openers are not “just hardware.” Adjustments can be risky, so consider a garage door professional if you need to move anything.
- Ceiling installs need extra caution: Use a stable ladder, follow torque guidance, and keep the area clear while testing.
- Mind e-bike battery handling: If you remove batteries for charging, follow the manufacturer’s guidance, and if you have concerns about charging safety, consider asking a qualified electrician about outlet condition and placement.
If you’re not confident locating studs, drilling into ceiling joists, or lifting heavy bikes overhead, hiring a handyman for the install can be a sensible expense. Many problems come from mounting errors, not the rack itself.
Conclusion: a simple way to choose your “best” rack
If you want one clean process, decide your rack style by space and lifting comfort, confirm your wall or ceiling structure, then buy the highest-quality version of that style within budget. That approach usually beats chasing a trending product name.
Pick one action today: measure stud spacing and the widest handlebar in your household, then choose between a wall system and a floor rack. Once those two numbers are real, finding the best bike rack for garage storage becomes surprisingly straightforward.
Key points to remember:
- Match the rack to your routine, not just your bike count.
- Measure clearances around cars and garage doors before ordering.
- Mount safely using the manufacturer’s hardware guidance, and get help if the structure is uncertain.