
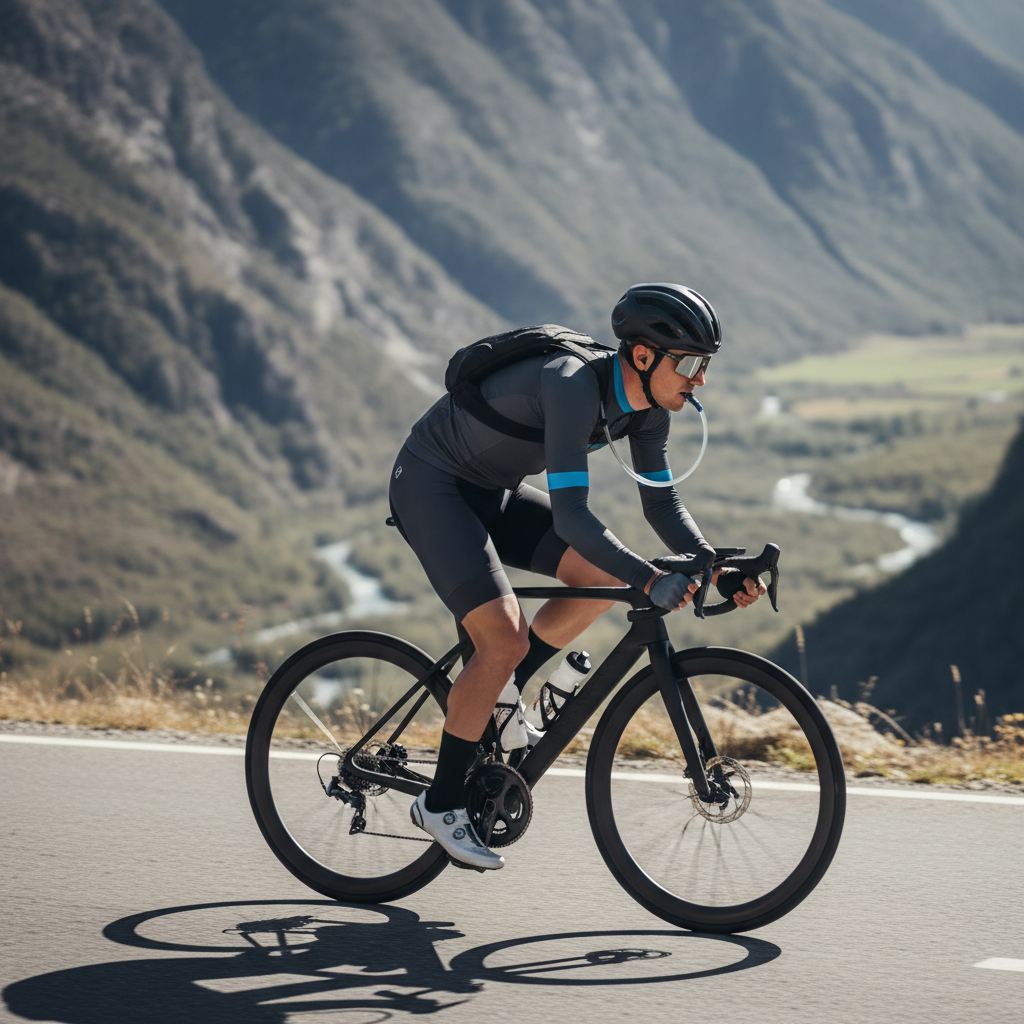
Best cycling water pack hydration comes down to fit, hose usability, and how stable the pack feels when you stand up to pedal, not just how many liters it holds. If your current setup sloshes, rubs your shoulders, or makes you skip drinking because it’s annoying to use, that’s already a performance problem and, on hot days, a safety one.
Most cyclists start shopping after one bad ride: cramped bottles, a dusty aid stop, or a long climb where reaching down feels sketchy. A good hydration pack solves access and capacity, but the wrong one quietly adds new friction, hot spots, and back sweat.
This guide focuses on what actually matters in the real world: capacity versus ride length, how the harness should sit on cycling posture, which bladder features reduce leaks, and a quick checklist to narrow choices without overthinking it.
What “best” means for cyclists (and why packs fail on the bike)
The “best” pack for cycling usually feels boring in use, meaning it disappears on your back and you drink more often without thinking. When packs fail, it’s rarely because the bladder “isn’t big enough,” it’s because the carry system and hose setup don’t match the way cyclists move.
- Stability over capacity: A pack that bounces when you sprint or climb out of the saddle drains energy and can irritate your lower back.
- Hose management: If the hose flops, kinks, or the bite valve drips, you’ll drink less. Less drinking becomes the real issue.
- Fit in a riding posture: Cycling leans you forward, which can make chest straps creep upward or shoulder straps dig in if the harness is generic.
- Heat and sweat: Back panels that trap heat can feel fine for 30 minutes, then miserable at hour two.
According to American College of Sports Medicine (ACSM), dehydration can impair performance, and hydration plans should be individualized based on sweat rate and conditions. That doesn’t mean you need a lab test, but it does mean convenience and comfort matter because they drive compliance.
Quick self-check: which type of cycling water pack are you?
Before specs, get clear on your ride pattern. Most people can narrow to one “lane” in under a minute, and it saves you from buying a pack that looks right on paper.
- Road cyclist, 1–3 hours: Often needs a slim, low-profile pack (or even a small hip pack) that doesn’t interfere with jersey pockets.
- Gravel, 2–5 hours: Benefits from extra capacity and storage for tools, snacks, and layers, plus better stability on washboard.
- MTB, technical trails: Prioritize bounce-free fit, protective shape, easy one-handed drinking, and durable materials.
- Bikepacking / long remote rides: Think refill strategy, filtration, and how the pack integrates with frame bags, not just liters.
If you routinely finish bottles and still feel thirsty, or you’re riding in heat where support is limited, a best cycling water pack hydration choice is usually the one that lets you carry more fluid without feeling bulkier.
Key features that actually change your ride
Marketing tends to fixate on reservoir liters, but cyclists feel the difference in the harness, bite valve, and how easy it is to refill at a tap or gas station sink.
Reservoir size (and the “too big” problem)
- 1.5L: Slim and stable, great for shorter rides or cooler temps.
- 2L: The most flexible “default” for many riders, especially gravel and MTB.
- 3L: Best when refill points are scarce, but pay attention to pack structure so weight doesn’t sag.
Bigger isn’t always better because water weight sits high and can sway if the pack lacks structure. If you only need 1.5–2L most days, a 3L setup can tempt overpacking and extra bounce.
Harness and straps (where comfort is won or lost)
- Wide, shaped shoulder straps: Reduce pressure points when you’re leaned forward.
- Adjustable sternum strap: Keeps straps from sliding off when you’re breathing hard.
- Stabilizer straps: Small side straps can dramatically cut sway.
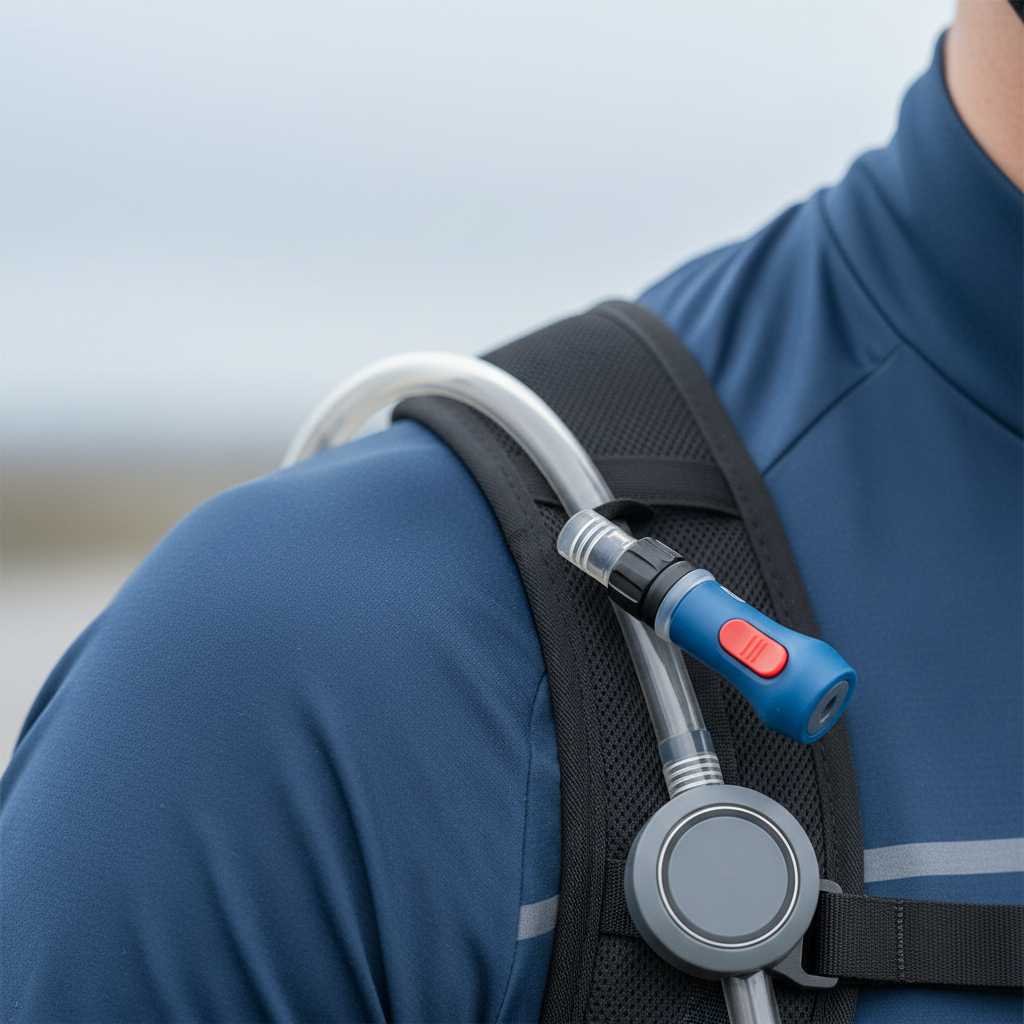
Bite valve and hose routing
- Locking bite valve: Helps prevent drips in transit or when the valve rubs your jersey.
- Quick-disconnect hose: Makes refills and cleaning less annoying, so you do them.
- Magnetic or clip retention: Keeps the hose where your mouth expects it, especially on rough terrain.
Comparison table: what to choose by ride length and conditions
Use this as a practical filter. It won’t pick a brand for you, but it will keep you from buying the wrong category.
| Ride scenario | Suggested reservoir | Pack style | Must-have features | Common mistake |
|---|---|---|---|---|
| Road, 60–120 min | 1.5L (or bottles) | Low-profile backpack / vest | Stable harness, slim shape | Buying a bulky 3L pack “just in case” |
| Gravel, 2–4 hrs | 2L | Hydration backpack | Easy refill port, hose retention | Ignoring storage layout for tools/snacks |
| MTB, technical trails | 2L | Trail pack | Anti-bounce fit, durable fabric | Loose straps causing sway and rubbing |
| Hot weather, limited refills | 2–3L | Structured pack | Ventilated back panel, stabilizers | Choosing ventilation over stability |
| Bikepacking day rides | 2–3L | Pack or hip pack + bottles | Comfort under load, easy cleaning | Not planning water sources and treatment |
How to fit and test a hydration pack (the 10-minute at-home check)
A best cycling water pack hydration pick should pass a simple test at home, ideally before you rip tags off. You’re looking for stability, clean hose access, and no pressure points in riding posture.
- Load it realistically: Fill the bladder about 70–80%, add the items you’d actually carry.
- Lean forward like you’re on the hoods: If the pack slides up your neck, the torso length or strap geometry is off.
- Do 20 bodyweight “pedal strokes”: Basically a light squat with alternating foot pressure. Bounce now becomes bounce on the bike.
- Practice drinking one-handed: You should be able to find the valve without looking.
- Check hot spots: Any sharp edge near collarbones or underarms usually gets worse with sweat.
Small adjustments matter: tighten stabilizer straps after you’re in position, not while standing upright. That one trick fixes a surprising amount of sway.
Practical setup tips: drink more, fuss less
Once you have a decent pack, setup decides whether you use it consistently. Convenience is the difference between “I carried water” and “I actually drank it.”
- Route the hose the same way every ride: Muscle memory helps, especially in traffic or on descents.
- Set a gentle reminder: A watch beep every 15–20 minutes can help in heat, but adjust for intensity and your own needs.
- Balance electrolytes when appropriate: According to Centers for Disease Control and Prevention (CDC), electrolyte solutions can help during heavy sweating; if you have medical conditions, it’s smart to consult a clinician.
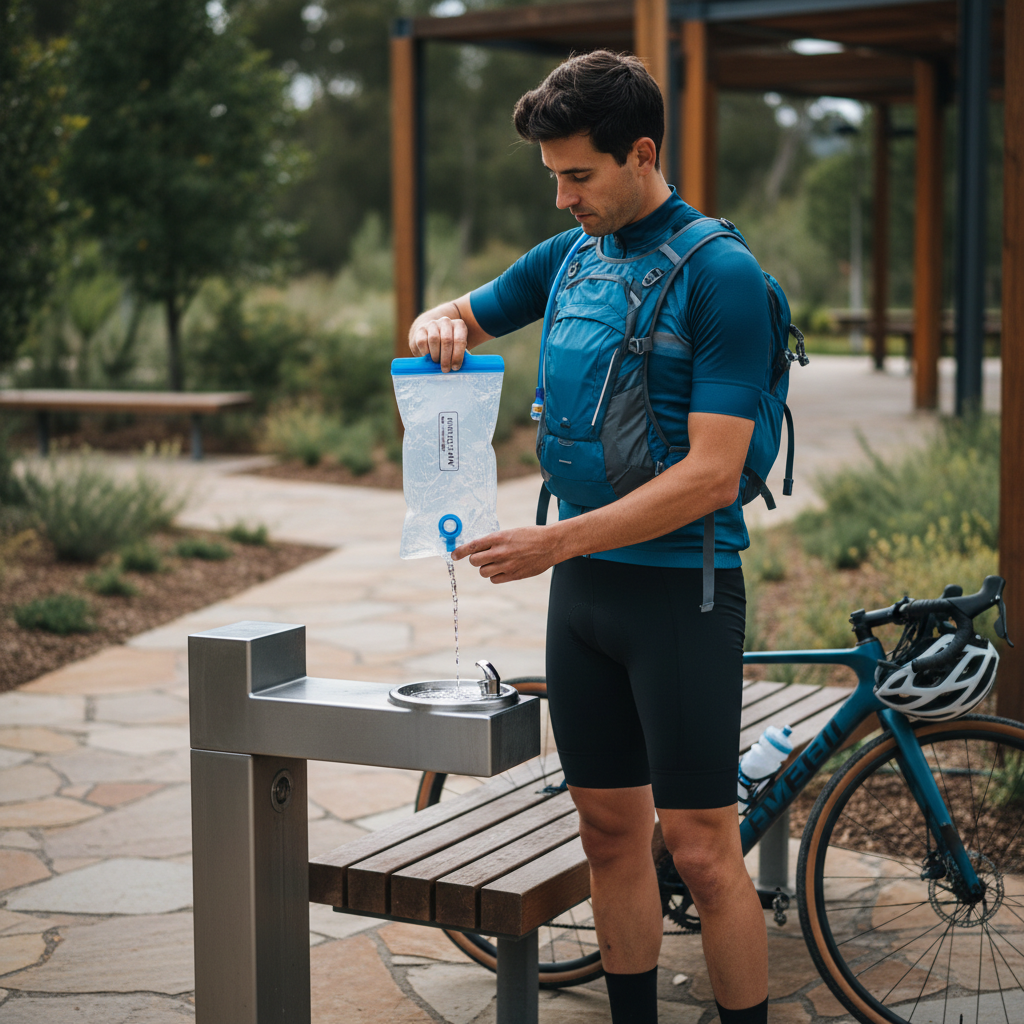
- Refill strategy: If you can reliably refill every 60–90 minutes, you can often go smaller and lighter.
Key point: If you’re frequently finishing rides with headaches, dizziness, or unusual fatigue, dehydration or heat illness might be involved, and you should take it seriously. In many cases it’s worth talking with a healthcare professional, especially if symptoms recur.
Common mistakes (and what to do instead)
Most “this pack sucks” complaints trace back to a few fixable missteps. Save yourself the return shipping.
- Overfilling every time: Carry what you need for the route, not the maximum the bladder allows.
- Skipping cleaning: Residual taste makes people drink less, and moisture can lead to mold. Use manufacturer cleaning guidance, and dry fully.
- Straps too tight: Restricts breathing and can cause numbness. Snug and stable beats “cinched.”
- Ignoring jersey pocket access: Some packs block back pockets; if you rely on pockets for food, test that before committing.
- One solution for every ride: Many cyclists rotate: bottles for short road rides, pack for gravel/MTB or heat.
When to consider expert help or a different setup
If you keep struggling despite trying a few configurations, it may not be the pack. Fit and heat management can be more complex than they look.
- Recurring neck/shoulder pain: Consider a bike fit consultation; posture issues can magnify strap pressure.
- Frequent cramping or nausea in heat: A sports dietitian or clinician can help you dial hydration and sodium needs safely.
- Back sweat becomes a deal-breaker: A hip pack or bottle-forward approach might suit you better, even if a backpack is popular.
It’s also fair to admit when bottles plus planned refills are simpler. The best cycling water pack hydration option is the one you’ll actually use without arguing with it every ride.
Conclusion: pick the pack you’ll drink from
A good hydration pack should feel stable, make drinking easy, and fit your posture without rubbing. Start by matching reservoir size to your refill reality, then prioritize harness stability and hose control, those two features usually decide day-to-day satisfaction.
If you want a fast next step, choose a capacity lane (1.5L, 2L, or 3L), then do the 10-minute home fit test before your first long ride, it’s the simplest way to avoid the “looked great online” trap.
FAQ
- What size hydration bladder is best for cycling?
For many riders, 2L hits the sweet spot for gravel and MTB, while 1.5L often feels better for shorter road rides. If you’re in hot conditions or far from refills, 3L can make sense, but only if the pack stays stable. - Is a hydration pack better than bottles for road cycling?
It depends on your routes and comfort. Bottles are simple and lighter on your back, but a pack can help if you struggle to reach bottles safely, ride long stretches without stops, or need more total volume. - How do I stop a hydration pack from bouncing while cycling?
Load the bladder partially, tighten stabilizer straps after you’re in riding posture, and make sure the sternum strap sits comfortably without creeping upward. If it still bounces, the torso length or pack shape may be mismatched. - Do hydration packs make your back sweat more?
Often yes, especially with less-ventilated back panels. If sweat buildup bothers you, look for better airflow designs or consider a hip pack for certain rides. - How often should I clean a cycling hydration bladder?
After rides with sports drink or in hot weather, cleaning sooner usually prevents taste and buildup. For plain water, many riders rinse and dry after each ride and do a deeper clean periodically, following the manufacturer’s instructions. - Can I put electrolyte drink in a hydration bladder?
Usually yes, but it increases cleaning needs and can leave residue that affects taste. If you do it, rinse promptly and clean thoroughly to reduce odor and buildup. - What’s the difference between a hydration vest and a hydration backpack for cycling?
Vests tend to hug the body and can feel very stable with less storage, while backpacks often carry more gear and can run warmer. For aggressive MTB or rough gravel, stability often favors vests or purpose-built trail packs.
If you’re trying to narrow options quickly, make a short list based on your ride length and refill access, then prioritize stability and easy drinking over extra features. If you need a more hands-off approach, a curated shortlist built around your terrain, climate, and fit preferences can save a lot of trial and error.